Monday, December 19, 2011

Tis the Season of Cooking with Winter Vegetables

Series: Produce Box, December 20, 2011 Deliver; Published Blog 12

Scorpacciata. In Italy, scorpacciata is defined as consuming large amounts of local ingredients while in season. A produce box provides local ingredients of a certain season grown by the farmers. Currently in season are lots of winter vegetables that do not mind a little cold air or frost on their leaves. The farmer from Capay Valley even thinks that a little frost might add a little flavor to the vegetables being frosted on his farm.

In this product box series I will provide a recipe to encourage you to use vegetables in season to make your own vegetable stock. All the vegetables provided my box are organic meaning no chemicals are used in the growing process.


In my produce box received this week, I have the following vegetables:


1 Red Kuri Squash, winter


1 lb. Red Potatoes


1lb. White Potatoes


2lb. of Baby Bok Choy


2 Fennel


1 bunch of Leeks


1 bunch of Nantes Carrots


1 bunch of Spinach


1 bunch of Green Leaf Lettuce


1 bunch of Fresh Rosemary


Fennel Vegetable Stock


I am creating my own vegetable stock to develop into a recipe to make fennel sauce. I like the smell and flavor of fennel. It has the hint of anise but not too overpowering like black licorice. It works well as a substitute for onions since it is also a bulb. It can be diced, sliced, minced, or finely chopped. If it is sauteed the edges of the fennel caramelize up lovely. The other part of the fennel of the plant are the stalks that stick out of the ground with its leaves similar to dill plant.


Ingredients and Directions:


Grabbing a large pot and turn on the heat to about medium.


Add in 2 tablespoons of grapeseed oil (or canola oil.)


Toss in a hand full of fresh herbs: Sage, Rosemary, Thyme


1 teaspoon of minced garlic


Stir to prevent the garlic and fresh herbs from burning.

I tossed in a torn up fennel bulb piece to saute with the fresh herbs and garlic. I didn't leave anything to toss.


Add in the rinsed fennel stalks and stir.


Fill the pot with water covering the vegetables.


In addition to the fennel to balance the flavor I tossed in a handful of carrots and a few strangling lettuce leaves.


I also carefully flipped over the vegetables inside the pot to make sure the top of the vegetables get cooked on the bottom.


Then only seasoned with pepper- No Salt needed. Why? In your final dish of using the vegetable, you will flavor with salt. So to decrease over use of salt, do not season the vegetable stock.


Optional:


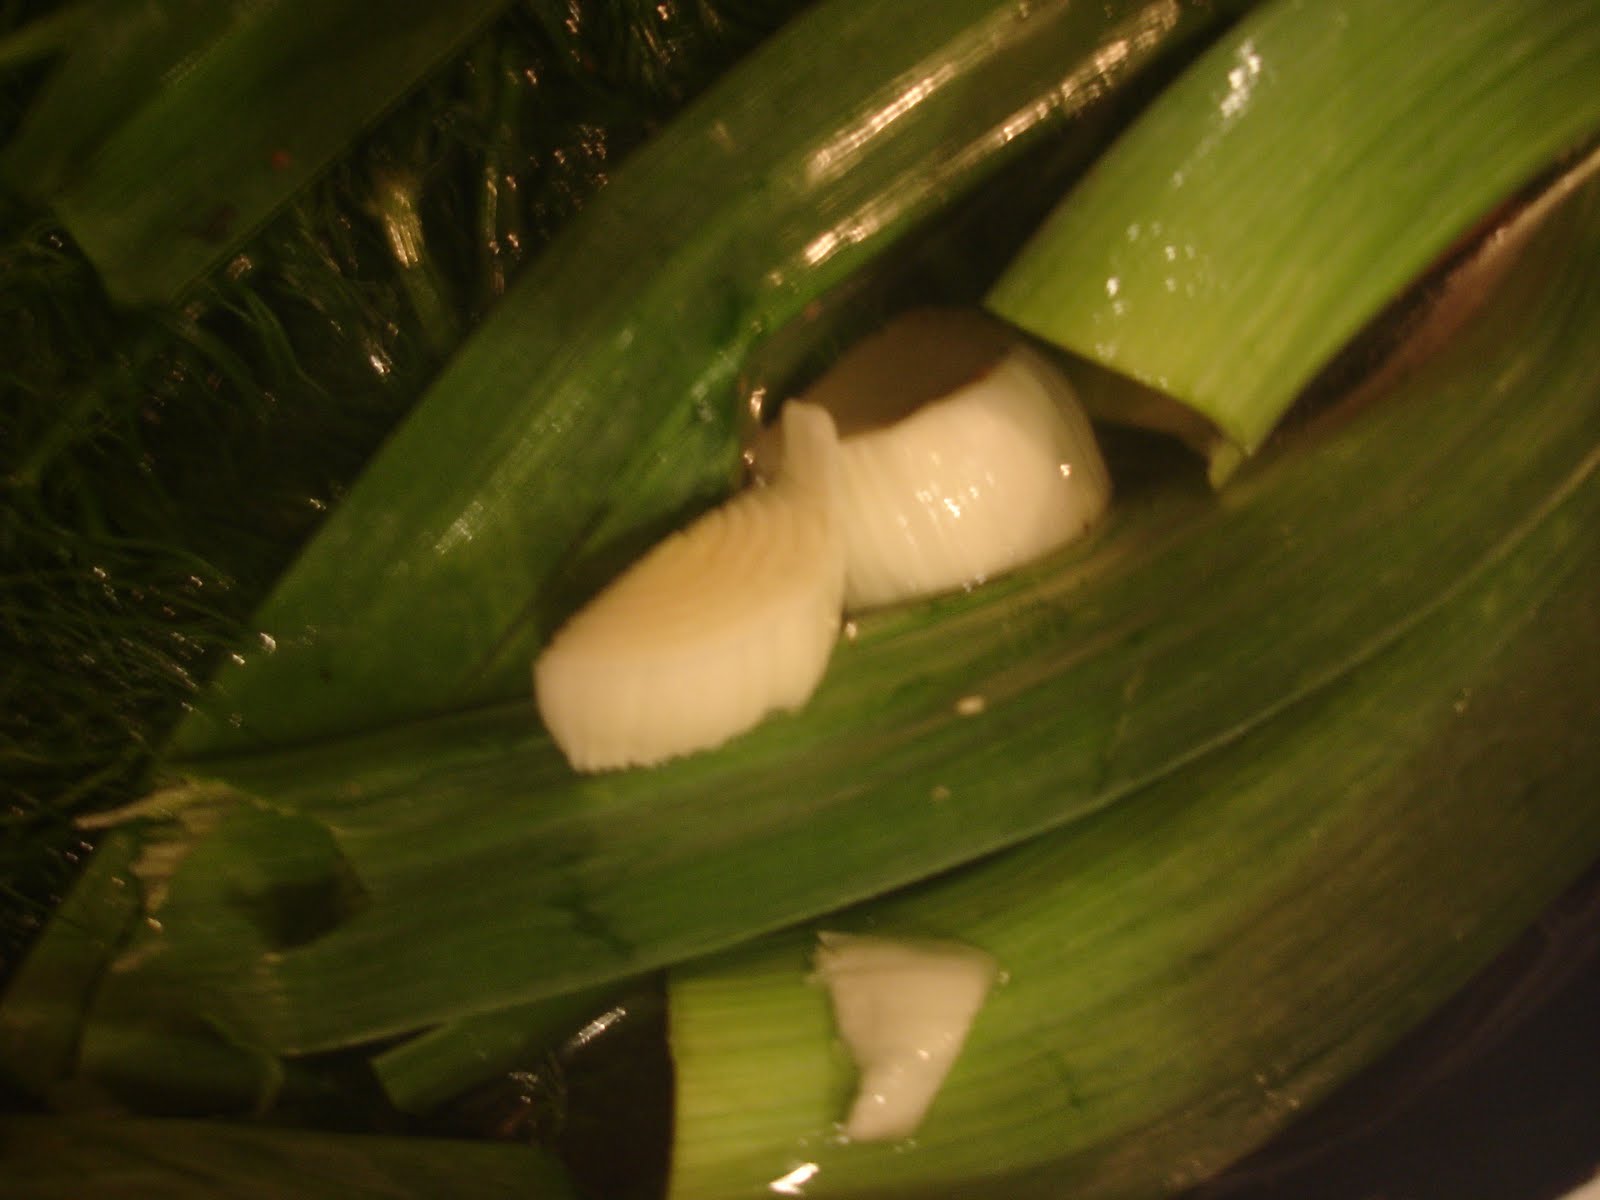
Since I was making a soup that needed leeks, I decided to toss in the green tops and part of the white bottom of leeks to my vegetable stock.


Add a lid and allow the stock to simmer for about 2 hours. Once it is done, turn off the heat and allow it to cool before removing the vegetables and straining out the fennel vegetable stock.


Here are the remains of the vegetables that flavored the water to create the stock:


This is stock to be used in soups or stews:

It can measured out and placed into the freezer for later use.

Making your own vegetable stock can be easy but takes a little time and lots of vegetables. My suggestion to you all is to be creative and add vegetables to the pot that you like.

Have fun cooking!

Tuesday, October 25, 2011

On the Eve of Pumpkin

Series: Produce Box, October 25, 2011 Deliver; Published Blog 11


The arrival of a new season brings in new crops. The weather has gotten a little cooler in the mornings and evenings. We have less daylight and more clouds. I love the changing of vegetables in my produce box. It inspired me to try my hand at a new recipe an Old Fashion Pumpkin Cookie.


Check out the list of vegetables I retrieved from my morning porch as I wiped the sleep from my eyes:


- A Sugar Pumpkin Squash


- 2 Garnet Sweet Potatoes


- 1 Large Yellow Onion


- Broccoli


- Celery


- Carrots


- Baby Bok Choy


- Collards


- Nantes Carrots


- Kale


- Fennel


- Green Leaf Lettuce


I am fascinated with a good pumpkin recipe especially during the autumn season. This year a recipe for Old Fashion Pumpkin Cookies and a Sugar Pumpkin squash both happen to be gifted to me on a fine evening. I figure it is a present from the Halloween Fairies and I gladly accept with much gratitude.

I pass this gift on to you to enjoy with your family.

Old Fashion Pumpkin Cookies

Step One


Combine in a bowl the following:


2 1/2 cups flour


1 teaspoon baking powder


1 teaspoon baking powder


1 teaspoon cinnamon


1/2 teaspoon nutmeg


1/2 teaspoon of salt


Mix and set aside.


Step Two


In your mixing bowl add 1 1/2 cups of sugar and 1 cup puree pumpkin (See recipe below.)


Whisk together.


Add in 1/2 cup (1 stick of butter) of softened butter


Then beat in the 1 large egg and 1 teaspoon of vanilla.


Step Four


Add the flour mixture into the pumpkin mixture.


Step Five


Bake in a 350 degree oven for about 15 minutes. The tops should be solid to touch and bottoms a light shade of brown.


Step Six


Swizzle white chocolate over the tops.


Step Seven


Open mouth, bite down for a moist cookie with a hint of cinnamon and pumpkin delicately warming you up for the cool evening night.


Baked Puree Pumpkin


Preheat Oven to 350 degrees.
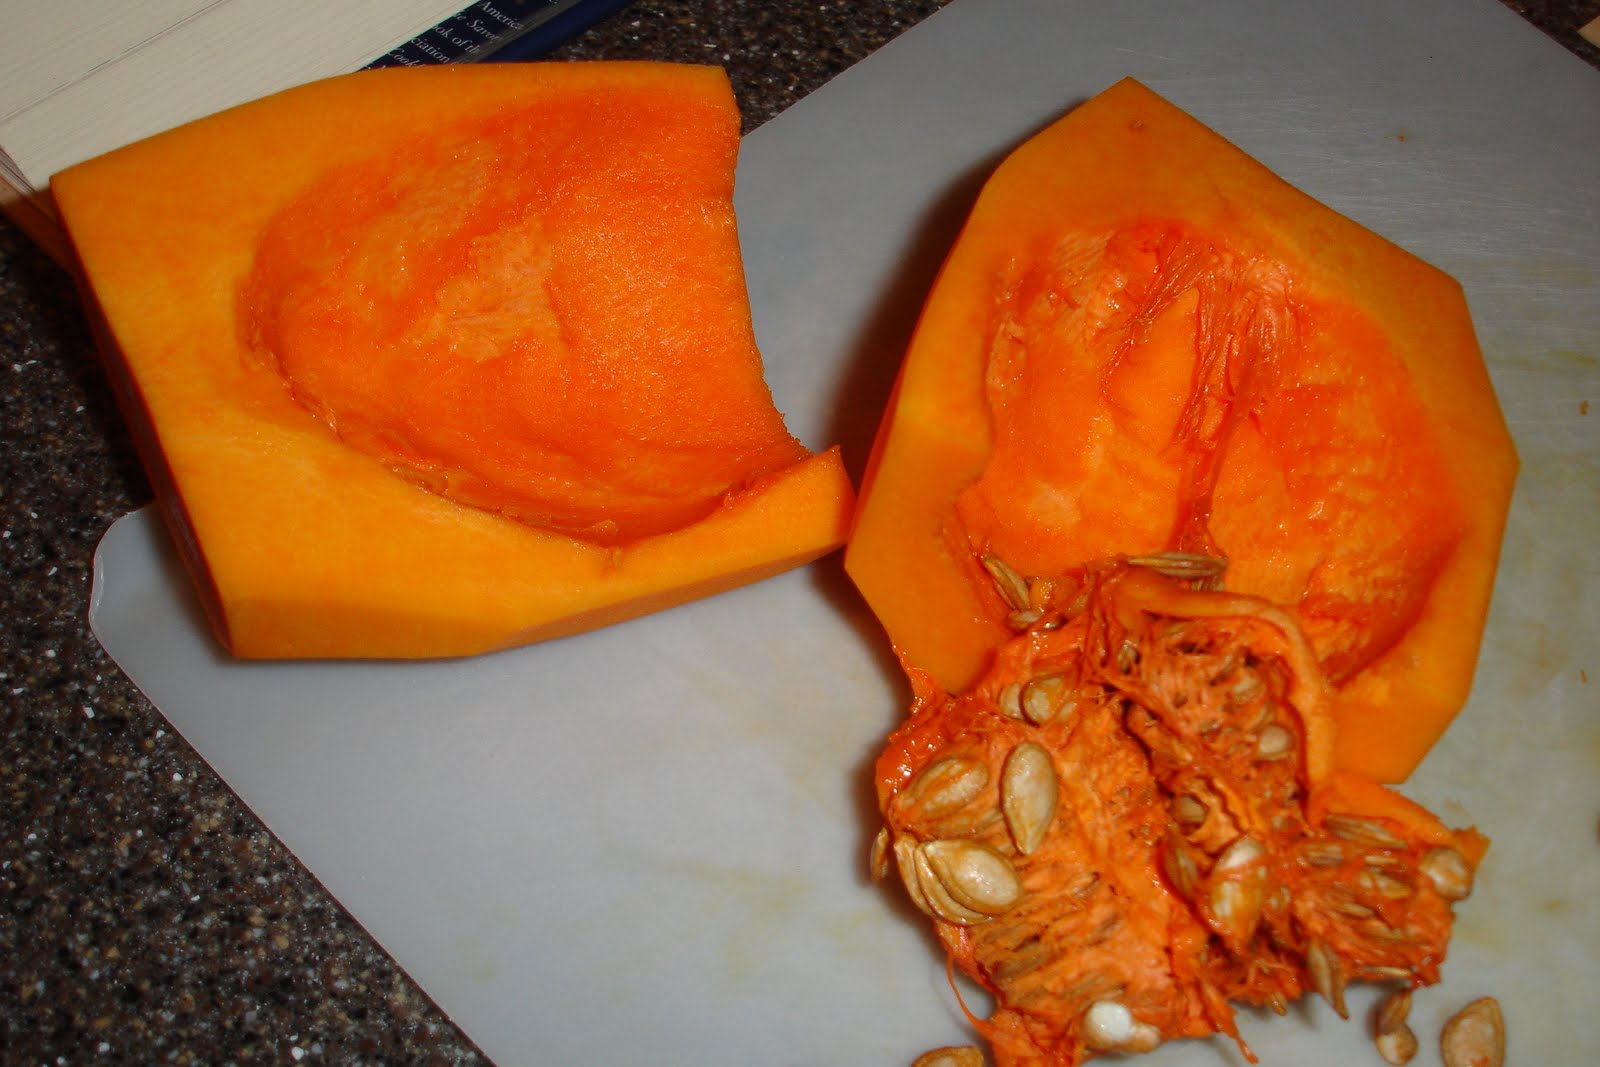
Cut into small wedges.
Remove seeds.
Bake for about 50 minutes.
Remove oven and let it cool.
Carefully slice the hard pumpkin off.


Add the pumpkin pieces to a Cuisinart and puree.


Wednesday, October 19, 2011

Ready for a bowl of Chili?

Over the years, I've worked on making a bowl of chili to my taste but more so because I LOVE CHILI CHEESE FRIES WITH BBQ SAUCE. It is simply delicious. (Well anything with BBQ sauce taste great.)

So here is my chili recipe that can be flexible for those meat eaters or vegetables only eaters basically a flexitarian recipe. My recipe can be a little time consuming but I figured out some short cuts for those with time commitments around the dinner time.


Meat (or Meatless) Chili

Preheat your stew pot.

For vegetarian version:

Add in your dry spices without oil. - Chili Powder, Cumin, Salt, Garlic powder, Cayenne, Pepper.


Once the spices have heated up. Follow to "Add in a little oil...."


For meat lovers:


Add in about a tablespoon of oil. Then add in your ground turkey (beef or pork or chicken)


While the meat browning- sprinkle your seasonings of chili powder, cumin, salt/pepper, cayenne.


Flip the meat and break it up until almost cooked. (I do not cook the meat all the way because when you add it back into the pot it will finish cooking.)


Remove from the heat and drain (if necessary).


Set aside. It will be added in towards the end of the cooking time.

For both versions:

Turn down the heat a little to below medium.


Add in about 2 tablespoons of oil.

Add in your cubed onion. Cook until clear.


Add in 2 teaspoons of minced garlic.

Add in diced pepper (optional.)

Allow the mixture to softened but don't let the garlic burn.

Short on Time- Easy Method:

The easy method is opening cans;however, for those interested in making your own 15 bean refried beans, chicken stock , or using own homemade stewed tomatoes recipes.

- Open 1 can (14.5 ounces) organic fire roasted diced tomatoes with green chilies


- Open 1 can (16 ounces) organic refried beans


- About 2 3/4 cups of organic chicken broth (vegetable broth for vegetarian)


Add in additional seasonings to taste...


For smokey sweet flavor: Add in smoke liquid, Worcestershire sauce, barbecue sauce (2 tbsp) and 1 tablespoon of brown sugar.


Bring the chili to simmer over low heat for about an hour. Remember to stir every 15 minutes and scrap down the sides.


Finally when you think it's almost done.


Add in your ground meat for those meat lovers and allow it to simmer a little longer until meat is fully cooked.


Turn off heat and leave on stove top to cool.

Taste test but don't forget to blow on the spoon! Adjust seasonings if necessary.


NOTES:


Added measurements in case you make your own homemade versions of canned items.


Organic versions can be used for this recipe.


For chili cheese Fries with Barbecue Sauce:


Cook fries according to package. I like them a little extra crunchy.


Spread french fries on a plate and spoon the chili on top.


Add a few swirls of barbecue sauce.


Enjoy with a fork!


Homemade Refried Beans


Making your own homemade refried beans isn't hard. I found through trial and error that it makes a difference in the chili. One thing I found helpful is soaking the beans. I do not recommend the quick couple of hour soak or placing them in a crock pot thinking they will cook. You might be a little disappointed. Just plan ahead the night before!


Soak the beans for 24 hours. Change water at least twice.


Heat up the pot on medium heat.


I like to flavor my beans depending on what recipe I will use them in.


For a chili recipe: I used chili powder and cumin. Season with pepper and salt.


Add in oil.


Drain the beans and add them into the pot. It will sputter with steam.


Stir and Pour water back into the pot to cover the top of the beans. I add about an inch of the top. It will boil away.


At this point you can optionally add in cloves of garlic and peppers to flavor the water.


The beans should be simmering/boiling.


There is a balance of heat that should be found to make sure your beans are becoming tender and the liquid is slowly evaporating. If the water gets to low add about a cup of water back in.

Stir.

Testing the beans. Remove one from the pot very carefully. When you bite into it, it should be soft. If there is a tiny bit of hardness to it, it will not become soft when you smash it. So make sure that when you think it is done, it should smash easily between your teeth.

Once the beans are done, remove from heat, remove garlic cloves and peppers (if you added) and grab your smasher!
Let your strength smash the beans-- transforming into refried beans. It might turn a little gray but don't worry. Season if necessary!

I don't recook them in oil but I add it into chili or burrito stuffing.


Chili Tacos


Have leftover chili? Here's my twist to using leftover chili and making a new dish from the last serving.


I had on hand a package of taco shells. Heat according to package.


I heated up my leftover chili.


I sprinkled cheese on the bottom.


Spooned my heated chili over the top.


Sprinkled cabbage and a little hot sauce.


Spoon guacamole or sour cream on top.


Simple meal made easy with leftover chili!


Enjoy and Have Fun Cooking!


Tuesday, October 18, 2011

Hey Batter, Batter...

Yes Folks- it is a fly ball over the left field. HOME RUN! We fried that fish...oops I mean baked the fish. Success measured in baseball is by the number of home runs a batter can achieve in a game; success in the kitchen is measured by clean plates, no leftovers, and full bellies of goodness.

My latest endeavor in cooking fish. I've attempted many different ways to cook fish for my husband who simply adores fish. Now if you know me I didn't like fish when I kid. My taste started to change when I tried fresh fish out the lake grilled on flat rocks when camping. When I got married to my fish loving husband, I tried even more to be more adventurous with fish.


After almost 13 years of marriage, fish recipes are starting to pour out of kitchen in new creations.


Parmesan Garlic Salmon


Preheat Oven to 400 degrees.


Prepare the sauce to top the fresh/thawed salmon fillet.


Sauce Ingredients:


1/2 cup of mayonnaise


1/4 cup grated Parmesan cheese


1-2 teaspoons of garlic powder


1 tablespoon of lemon juice


1/2 teaspoon of cayenne powder


pepper/salt to taste


Optional: minced chives


Blend together.


Grab a baking dish line with parchment paper.


Place fish and top with sauce.


Bake until almost flaky which takes about 20-30 minutes depending on your oven and preference.


I grabbed a picture to help remind me to make this meal again since my husband simply enjoyed the flavors of the fish & sauce blending together in each bite.


I paired the dinner with a side dish of broccoli and pasta. The pasta was a cheesy/tomato flavor.


The coolest thing about this meal -- it took only 30 minutes from prep to sitting down at the table to eat.


Have fun cooking!

Sunday, October 16, 2011

Granola Expedition

Granola Expedition

Are you hesitant about making your own granola? Not sure if it will turn out and then afraid that you would have to toss it? Or worried that when you looked up the recipe on the Internet you recognized half the ingredients were not budget friendly. Well stop worrying any further! I was in your shoes before now I am confident that I can inspire you to try my recipe. It uses flexible ingredients, relies on few ingredients, and can be kid friendly. (You can also make it with organic products.)


It was late at night and I was watching the Disney channel since it was left on. I saw this recipe info commercial. It had a Chef from Food Network mentoring a few Disney kid stars on how to make granola. I hadn't written it down but I was confident that I would find it on the Internet the next day. (No luck- it's a hard recipe to track down! Lizzie's Granola.) Instead I found similar recipes that caught my fancy plus with the visual demonstration from the Disney show I thought I could try.

Granola Expedition

2 1/2 cups of rolled oats

1/4 cup of olive oil (you can choose to use canola oil or whatever baking oil you have on hand)
1/3 cup of brown sugar
1/3 cup of corn syrup (or honey)


I also ground up a 1/2 cup of mixed nuts.


1 teaspoon of cherry extract (or vanilla)


1 teaspoon of cinnamon

Toss all the ingredients listed into a bowl to stir together.


Spoon into a large rectangular glass dished.


Place in a 350 degree oven for 15 minutes. Stir.


Place back into oven for another 15 minutes or until lightly golden brown.


Remove from oven.

2nd Part: Prepare while granola mixture is in the oven.

Here's what I add my twist.
I had this leftover nut trail mix. I just got tired of eating it but didnt want it to go to waste.
So I decided to pick out the banana chips. Ground them up just a little to make it smaller pieces.
I removed the chunks of dried fruit and also ground those into smaller pieces.
Finally added the whole nuts.

Once the granola mixture is removed from the oven. Toss together to start the sugars cooling. Do it slowly for more chunks.


Tips:


More sugar in a mixture, more easier to burn.


Do not add in the nuts or dried fruit. They will burn or harden.


Enjoy and Have Fun Cooking!


Monday, October 10, 2011

Cilantro Coleslaw

Adding a new twist to a traditional recipe: Coleslaw with an Asian twist.

I eyeballed my measurements based on how much salad dressing I want to make.

Dressing:

Mayo
Olive oil
Rice Wine Vinegar
Lemon Juice
Sugar
Salt/Pepper
Cayenne
Lots of Cilantro chopped

(I'll try to develop measurements and repost later on with them.)

Slice up the cabbage into thin shreds
I also added carrots, cucumber, and sweet pepper for color!

One thing to note with coleslaw dressing as soon as the dressing and cabbage are mixed together the dressing will get a little runny and the cabbage will soften. So wait until the last minute to mix and serve.

Tuesday, August 23, 2011

Weaving in the Vegetables


Inspiration comes and goes....I am inspired by recipes that incorporate vegetables into the main course. Usually it is meat, vegetable, and carbohydrate is on our family dinner plate. My latest attempt is to find recipes that inspire a weave of the usual into something new. Here's a little inspiration for you:


Zucchini Spaghetti

Trying to cut back on your carbs? Or trying to get your kid to eat more vegetables? This is a yummy recipe for the summer.


Spaghetti and sauce will prepared as normal.

Cut zucchini into matchsticks and saute with olive oil under slightly tender. Remove and place into a bowl.

A flavoring tip: add whole peeled cloves of garlic into the pasta boiling water to enhance with a garlic flavor. Remove and smash to saute with the zucchini.

Toss the zucchini with cooked spaghetti and sauce.

Plate up with green salad and turkey meatballs for a complete meal with extra vegetables.

Here's a picture of what it looks like and what inspired me to make it....


Second menu item that I hope will catch your fancy. It weaves ground turkey, oats, and broccoli into an Asian themed burger for the indoor grill. This recipe was created in cooperation with my husband. He had the idea and I executed the recipe.


Homemade Vegetable Burgers


Mix in a bowl the following for the turkey burgers:


1lb of ground turkey


10 broccoli florets processed in the food processor (frozen broccoli will work as long as it is slightly defrosted 4 minutes at power 1.)


1/2 cup of rolled oats


For seasoning: 1 tsp of red chili paste, 1 tsp of minced garlic, 2 tbsp of soy sauce, 1/2 tsp of oyster sauce


Blend and make into patties.


I noticed the burgers are a little tender and require light touch. I also made sure to oil the side of the burger before I placed it on the grill. It seemed to help just a little.


As a side dish to my burger, I prepared a simple fruit salad with apple slices, orange wedges, and fresh blueberries.


From my family dinner table to yours- Enjoy!!


Thursday, June 9, 2011

Turkey Meatloaf Muffins Topped with Bacon Jam

This recipe makes my mouth water. It is an easy portion controlled meal making you grin with satisfaction.


Meatloaf Muffins Topped with Bacon Jam


Preheat oven to 375 degrees.


Grab a pound of ground turkey.


Add it to a bowl with 2 slices of bread torn in pieces, 1 egg, 1/2 onion diced, 1 stalk of celery diced, a tablespoon of Worcestershire sauce, and season with pepper and salt.


Smoosch together so the mixture looks well blended.

Scoop about 1/4 cup into a 12 count muffin pan or distribute 1/2 cup mixture into 6 count jumbo muffin pan.


Place in oven until 5 minutes more to cook. Top with the Bacon Jam mixture (recipe to be posted later.)


The meatloaf will be done when the internal temperature reaches 160 degrees.


Dish up with a side of mini penne with a fresh tomato sauce and garlic bread.

Enjoy!


Sunday, February 13, 2011

Easy Pecan Bars

Pecan Bars
An adapted recipe selected from one of my favorite cook books: Food for Friends by Sally Pasley Vargas


Recipe is divided into two layers.
Bottom Layer:
Preheat your oven to 350 degrees.


Add the following ingredients into a food processor:
1 ½ cups of all-purpose flour
6 tablespoons of brown sugar
Salt to taste
1 stick of butter
1 teaspoon of vanilla


Pulse until a powdery substance.

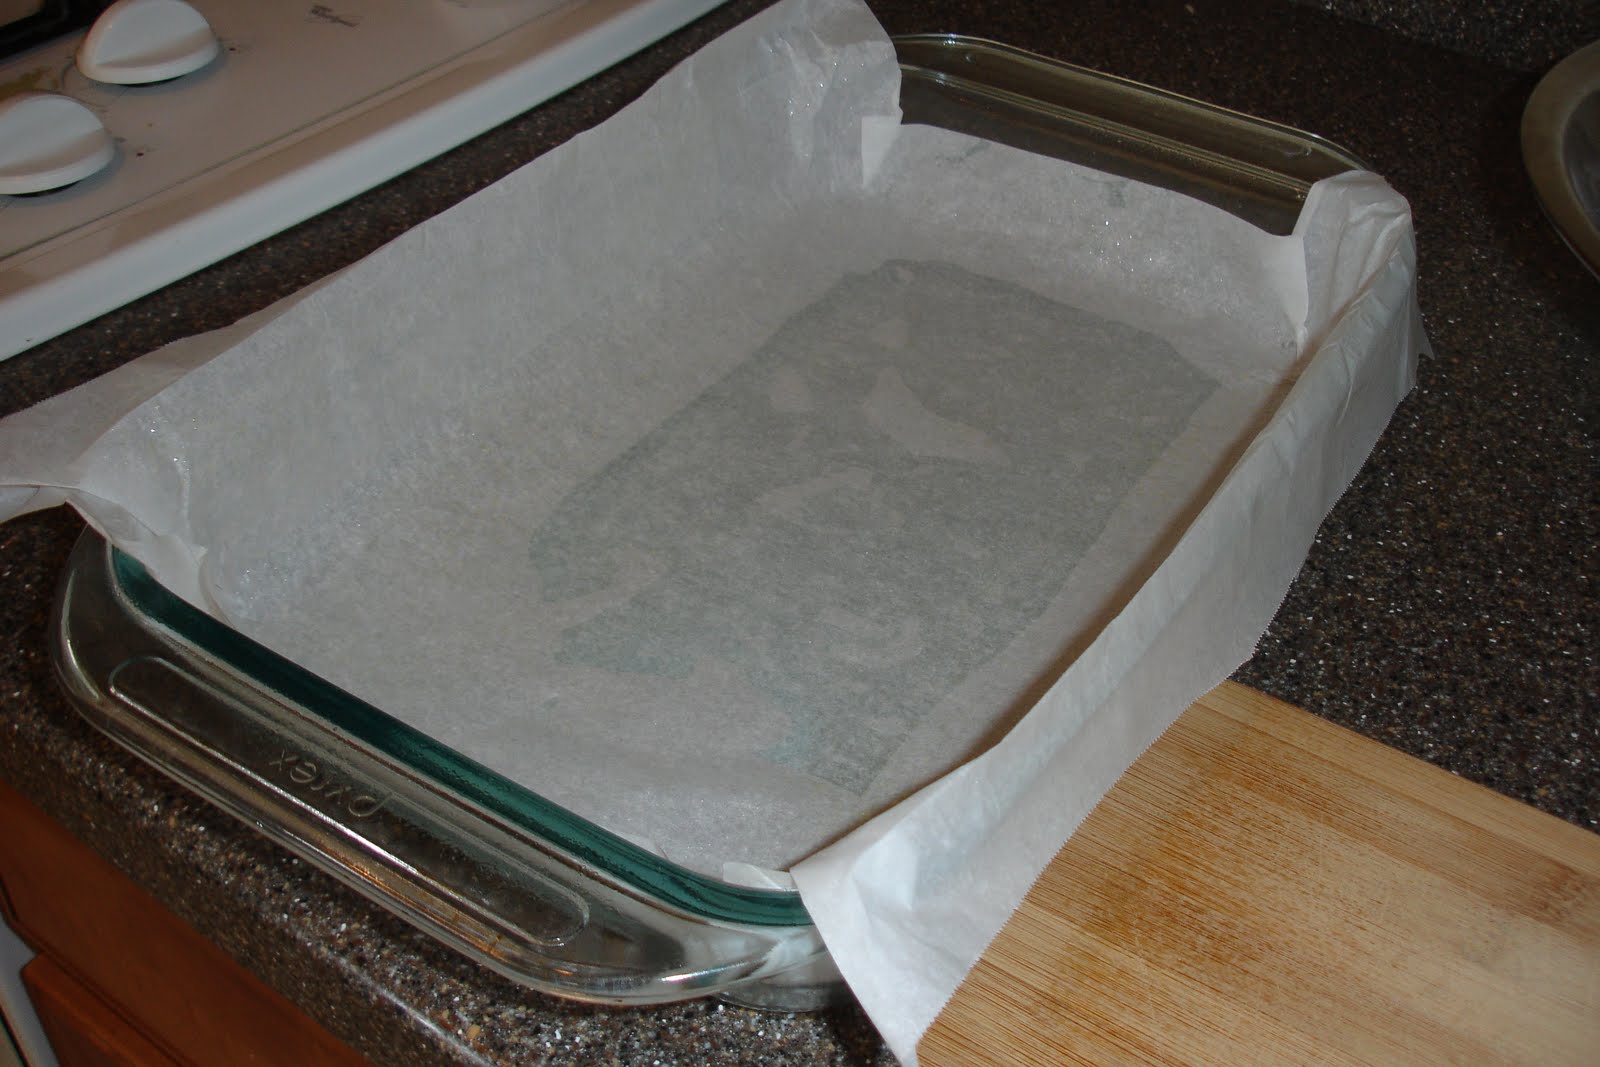
Prepare your baking dish a 9 by 13 works fine. Line with parchment paper. Cut and fold to the pan.


Pour the mixture into the pan.

Use your clean hands to pat to evenly compact the bottom layer.


Bake in the oven for about 10-12 minutes. Remove from the oven when done.


Top layer:

Grab a thick bottom small saucepan. Add in the following ingredients:
1 stick of butter
½ cup of brown sugar
½ cup of dark corn syrup
1 teaspoon vanilla


1 tablespoon of heavy cream

(My substitute: 1 tablespoon of powder milk and 1 tablespoon of butter)


Stir over medium heat to melt butter.
Continue to stir as you turn up the heat to bring to a boil.


Let it boil for 1 minute without stirring.

Pour over the baked bottom layer.

Sprinkle about 2 cups of pecans over the top of the top caramel mixture layer.


Place back into the oven for about 20-25 minutes or until the topping is uniformly bubbly.


*Please use caution when you remove this dessert from the oven. It will be very hot.*

Remove and aside to cool. Let the caramel topping cool and solidify to touch prior to cutting into bars. It takes about 15-20 minutes to cool.

Wednesday, February 9, 2011

Your Taste Buds Will Adapt


In reflection while cooking a stir fry today, I realized that I've started to enjoy kale, chard, and collard greens. Prior to receiving a produce box, I hadn't really thought to purchase kale, chard, collard greens, or even butternut squash on a regular basis at least not twice a month. This sums up the fact the more you give it a try then better chance that you might like eating it.

So here are my salutes to new vegetables creeping into my life and my family eating habits. My first recipe is to make saute greens.

Saute Greens

Grab about a 3-4 leaves of kale and 3-4 of chard.
Remove the stem down the middle of the leaf. This is really tough and will not make for pleasant eating.

Next roll up the leaves. Slice the into thin strips. Soak the greens in a bowl with water. Rinse. Set aside.
Slice up an onion.
Grab out a nonstick saute pan with a lid. Heat on medium heat. Add olive oil. First caramelize your onions. Remove them.
Drain the oil back into the pan. Make sure the pan is nicely warm.
Remove the greens from the bowl of water and place into the saute pan.
Cover and let it steam until the leaves wilt.
Stir.
Season with a little salt and pepper to taste.
Remove the lid and let it simmer off the access liquid.
Add back in the caramelized onions.
Stir.
Get ready for delicious greens and pair up with a meatloaf muffins, tater tots, and a fruit salad to make a great family dinner.


My recipes have transformed to incorporate these greens into my menu.

Wednesday, January 26, 2011

Everyday (Birthday) Cakes

As far as I can remember I loved looking through cook books. I think I was somewhere in 3rd or 4th grade when it came into my sister's and mine possession. It was when we really started to learn about cooking and took an interest in our food presented on the dinner table.


There was this one cookbook that I fondly remember as a kid that was especially for kids. Inside was a pretty picture of a chocolate cake with a design and balloons in the background associated with birthday parties.


(One thing I've learned through the years is that the picture may look pretty but it doesn't make the food taste any better once it is made.)


Eventually one day I found a recipe that sounded good with what I imagine a yellow cake to taste like with chocolate butter cream frosting. I stumbled upon a website ( King Arthur Flour) that provided an easy homemade golden vanilla cake. I use to receive their magazines and I remember the recipes within them but forget to clip them out. Well low and behold, they are now on a website with pictures!
Since it was my husband's birthday, I wanted to try it out but I checked with him to see if he would rather have oatmeal cookies with a marshmallow filling. The cake won!


Anytime I am going to plunge into the kitchen to start cooking, I like to write down my instructions and ingredients. This helps tremendously in making sure I don't miss a step. Sure- I could have printed it out and read it before trying it; however, the process of re-writing the recipe helps imprint it in my memory. I strategize on what steps to take. I group my ingredients and methods.


As soon as I got home from work, I started my task after being barreled down my two 40 pound puppies. I tied my hair back, pushed up my sleeves, put on my apron, and washed my hands. I was ready to start cooking! Since I had both desert to make and a dinner to cook, I acted upon an important piece of advice: Mediate a minute just to put into perspective the timing of a meal plan.


Thoughts that go through my head...


What needs to be done first?


What is second? If I get this task done, what is my next?


Can I overlap cooking times for a meal?


Timing is crucial in the kitchen. If the timing goes well it translates to sitting down for dinner at our regular scheduled time. Just like a restaurant, the guests like to have their meal at a certain time. So I treat my family the same way because in reality the body likes routines and starts the digestion process in the same timely manner each day.


Homemade Vanilla Cake with Chocolate Butter cream Frosting


Back to baking a cake. Here's how I started this process. Grabbed the butter, eggs, and milk for both the cake recipe and chocolate butter cream recipe. Just like baking cookies, room temperature ingredients blend together much butter than cold.


Preheat 350 degrees.


In a large bowl- whisk together the following:


2 cups of sugar

3 1/4 cups of flour

2 1/2 teaspoons of baking powder

1 teaspoon of salt


Next- grab your very soft butter and your hand mixer.


3/4 cup butter, softened


Mix this with the dry ingredients and it will turn the mixture sandy.


Grab the milk and vanilla.

1 1/4 cup milk, room temperature

2 teaspoons of vanilla


Add all at once and turn on the hand mixer - 30 seconds at low, 30 seconds at medium.

Scrap down the sides.


Grab your eggs. I place them in warm water to bring them to room temp.


4 eggs


Crack 1 egg at time and add into the mixture. Blend for 30 seconds. Scrap time the sides. Repeat this process 3 times.


With the last egg cracked and added. Turn on the mixer for 30 seconds on medium high.


Time to pour your batter.


You can choose to use either cupcake pan or bundt or cake pans. It just depends what you would like. Just make sure to use parchment paper or cupcake holders.


Place in the oven and bake until just about light brown.


Remove from oven and set aside to cool. Once it pulls away from the side a little, remove from the pans and place on a cooling rake.


Chocolate Butter cream Frosting


The frosting to top it off. I found this recipe after a quick google search. I decided to halve the recipe as I went along. Seriously what do you do with too much frosting and in my case I'm not a big fan of the sugary topping. So I tried to make it to my liking. I taste tested it along the way. I found this important but I went into a sugar shock at certain moments.


It helps to use room temperature butter and room temperature milk. A microwave can assist if you run out of time but make sure not to let the butter get too melted into soupy liquid phase.


Place into the mixing bowl:

1 stick of butter, cut into pads.

3 cups of powder sugar

3 Tablespoons of milk

1 teaspoon of vanilla

1/8 teaspoon of salt


Use the hand blender on low and let it blend together for about 30 seconds. About a little bit more milk if it is too chunky. Smooth it out just a little with about 30 seconds more.


Chocolate- I used my unsweetened cocoa powder. On the side of the package, it provides a chocolate square equivalents= 3 Tablespoons cocoa + 1 Tablespoon canola oil


I grabbed a small pot and heat it up on low. Added in 6 Tablespoons of cocoa powder and 2 Tablespoons of canola oil. I mixed it together until it became smooth and warm.


Pour it into my frosting mixture.

Next I turned my hand mixer on medium high to whip up the frosting.


Frost your cake once it has cooled with the chocolate butter cream frosting.


Once the cake is frosted place the candles for a birthday wish!

Wednesday, January 12, 2011

Food Blogging Time

As I search the Internet for recipes, I notice more and more individuals are catching the food blog virus. It is wonderful! There are so many views and so many ways to cook wonderful food. As a reader and a writer, I want to provide an insight to how I like to cook but keeping in mind my food preferences and additionally my own family member's food preferences. I can't at all times make each person happy with my cooking (but at least they get dinner cooked for them.)

Please take a moment and review the various recipes with the hope that you copy & paste them to try later... like I do. Take time to write down a recipe to get inspired and cook up a feast while having fun cooking it!

Tuesday, January 11, 2011

The 6:30 Dinner Crew

Welcome to a New Year! Let's dive into some new dishes with the help of my latest delivery. Today I received the following:

A bunch of carrots
A bunch of Collard Greens
1 Butternut Squash
A bunch of Purple Kale
A bunch of Broccoli
A bunch of Chard
A pound of Zucchini
A head of Radicchio
A bunch of Leaf Lettuce
A couple pounds of Sweet Potatoes
A red Onion
A half pound of Shallots


Many of the vegetables are easy to use in an average dinner menu but the Butternut Squash, Kale, and Collard Greens are my hardest to develop into a like-able dinner plate item for my family.

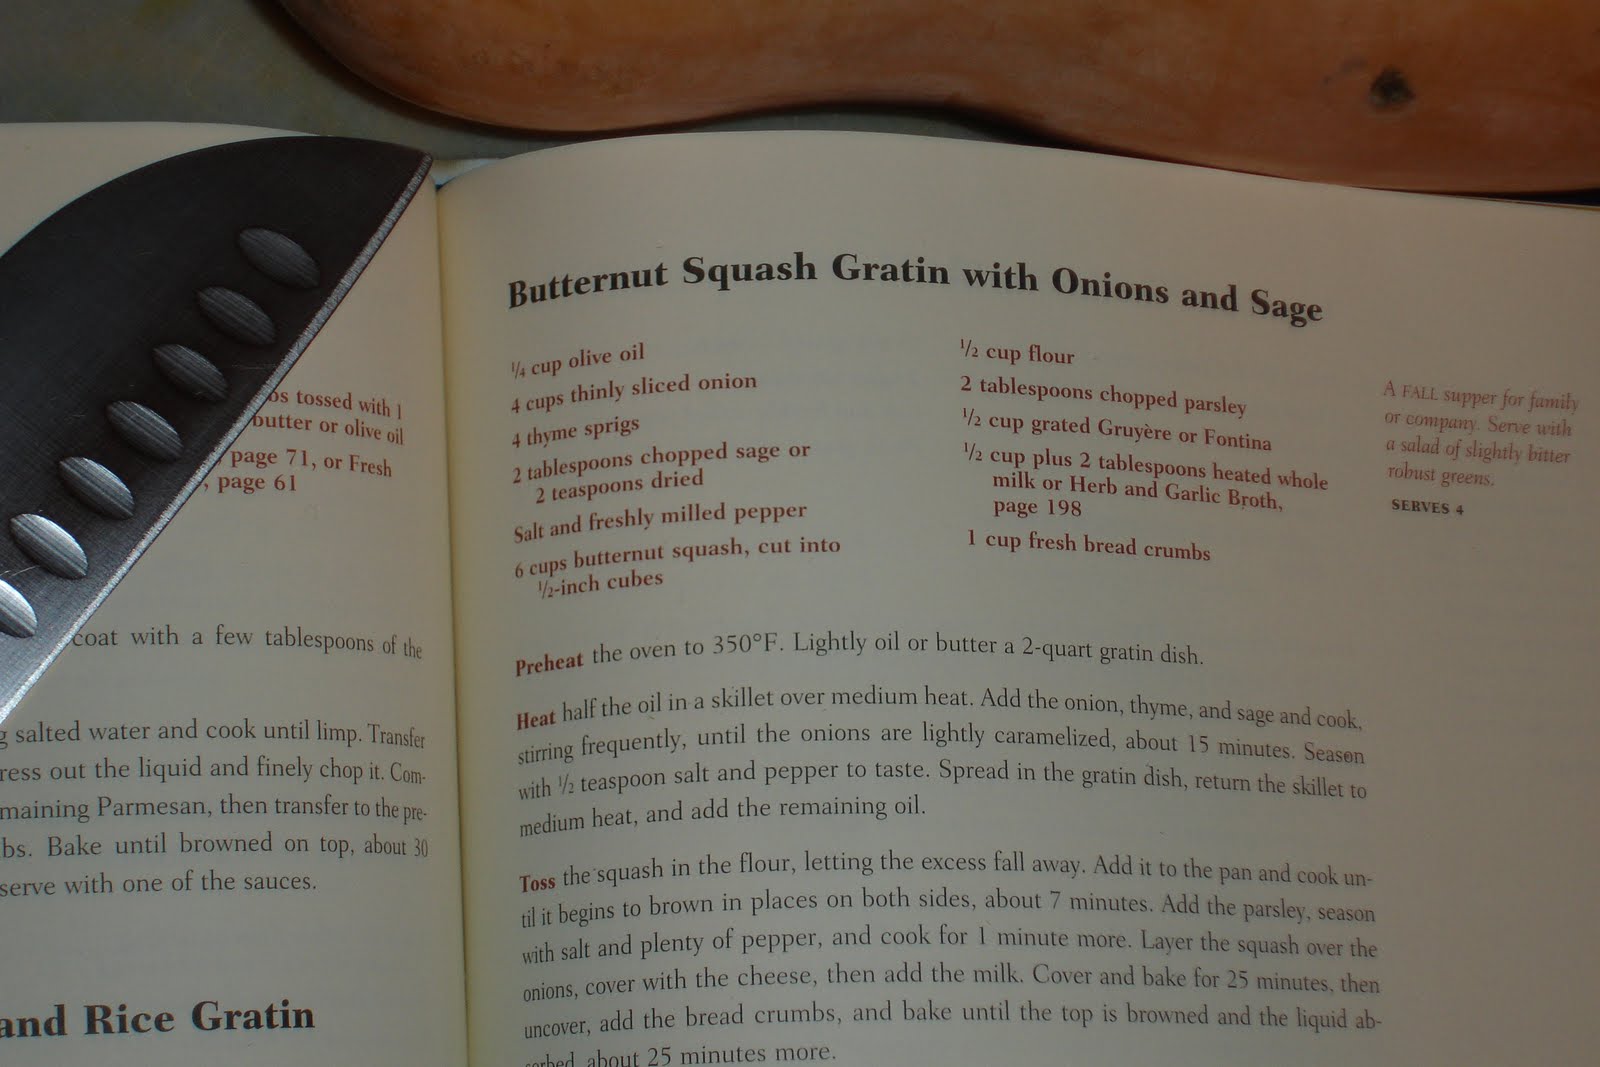
I first took on the butternut squash.What do you make with it besides a Butternut Squash Soup. Well, I turned to many cookbooks to seek my answer (or a quick search on the Internet) for recipes.


Here's what I came up with and thought would work for a tasty menu item:


Butternut Squash Gratin with Caramelized Onions
Needed in Pantry Raid:

Olive Oil
1/2 Onion
1 Small Butternut Squash
Flour
Butter
Milk
Cream Cheese
Bacon Jam - optional
Bread Crumbs
Pepper and Salt

We will break this recipe down into steps for each layer.


Step 1: Caramelize Your Thinly Sliced Onions, Season with salt and pepper.


Place into the bottom of the casserole dish.


Step 1A: Preheat your oven to 350 degrees.

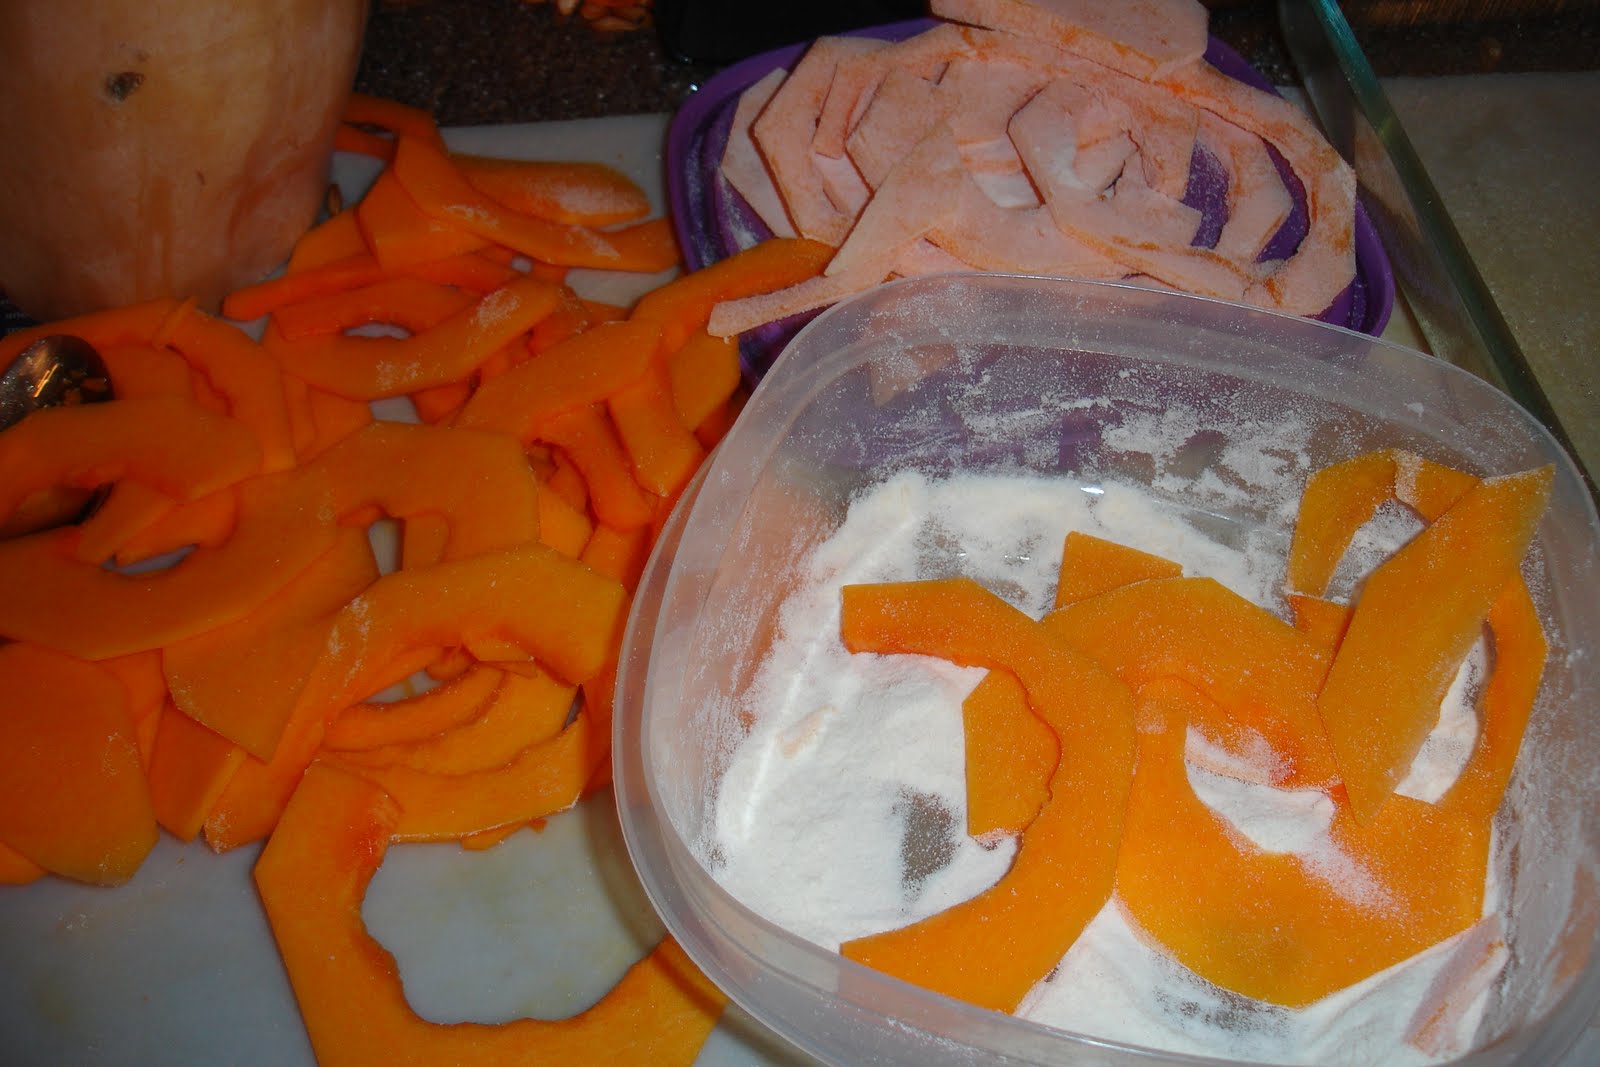
Step 2: Evenly slice your butternut squash into moon wedges. Toss in the flour and shake away extra. Place batches into the same heated skillet that was used for the onions with some additional oil for browning the butternut squash. It takes a few minutes on each side.


This helps to tenderize the butternut squash to quicken the cooking time.Add on top of the caramelized onions in the casserole dish.


Step 3: Grab a few tablespoons of butter to melt in the same pan and add in any leftover flour to match the amount of butter added. This will start a rue that will eventually turn into a white cream cheese sauce. Add in a cup of milk for each Tablespoon of butter/flour ratio. (For example: 1 Tablespoon of butter, 1 Tablespoon of Flour, and 1 Cup of Milk - makes a perfect white gravy.) Add in a package of cream cheese (and a Tablespoon of bacon jam if you have it.) Stir until almost melts. Season and pour it on top of the butternut squash and caramelized onions in the casserole dish.


>


Step 4: Finally sprinkle evenly over the top a thin layer of breadcrumbs. Open your oven and let it cook for about 20-25 minutes. At the very end when the butternut squash gratin is bubbling around its edges. Turn on your broiler and let the top brown up.


Step 5: Remove and let it cool.

Step 6: Did I mention make sure to let it cool?


Step 7: Serve up to your family to see what they think.

Opinions from my family: Second servings and cleared plates pointed in the direction that they enjoyed it and it turned out to be a good recipe.


This recipe helped inspire me to create a vegetarian lasagna using the butternut squash and a white sauce. See upcoming posting for the recipe.

Monday, August 23, 2010

3 More Reason to Eat Your Fruit & Vegetables

3 More Reason to Eat Your Fruit & Vegetables

1. A recent study reported by BBC News website on August 19, 2010 suggested green leafy vegetables may reduce the risk of developing diabetes. This is great news for those have a chance to change their lifestyle and reduce risk of developing diabetics. The message is very clear: Change your eating habits! Eat your 5 servings a day of fruit and vegetables. This translates to meaning that chips and soda are not helping your body. Plan your meals and snacks around fruit and vegetables.


2. Another report also reported by BBC News website March 2010 that two key medical treatments to halt diabetes are not resulting in reducing the risk. Only exercise and a healthy diet can really show the desired affect for the patient. Remember that 30 minutes of exercise per day can help a person. This can be split into 3 “10 minute” exercise intervals. Sometimes we might have 10 minutes here or there but can’t commit to 30 minute blocks of time.


3. One more article worth mentioning for those who love to eat white rice. Researchers are recommending a replacement of white rice with brown rice and/or wholemeal bread. The reason is simple: white rice causes a steep increase in blood sugar. Diabetics need to be concerned with the release of glucose into their bodies. A slower release is important.


Another starch that most diabetics should consider are sweet potatoes. A great substitute and an addition to baking with a brown potato.

Tuesday, July 27, 2010

When was the last time you visited a farmer's market?

As the warm weather enters the valley the farmers set-up their produce stands.

As a child/teenager, it was a delightful early morning trip to the farmer's market. Yes- it was hard to get up about 7:00 in the morning but it was totally worth it. We always had fresh produce. I continue on with this tradition of going to the farmer's market but it's not so early in the morning more like mid-day. Down the street from my work are two farmer's markets which are bustling with lunch time visitors.

A few things to keep in mind when visiting the farmer's market:

- Bring your own reusable bag to carry all your purchases.
- A pocket for a quick grab of cash or change.
- Walk around the market to mental notes of the prices. One table might have a better deal than another.
- Put yourself on a budget.

For $5 - this is what I bought:

- Rainbow chard - $1
- cilantro bunch - $ 1
- 4 large tomatoes - $1
- 1 basket of cherry tomatoes - $2

These ingredients will transform into various components of a meal.

Rainbow Chard a great green leafy vegetable to enjoy which replaces spinach. I saute it with a little bit of garlic and soy sauce.

With the tomatoes and cilantro, I will make a fresh salsa to enjoy with some homemade corn chips.

Lastly, the cherry tomatoes will be made into a chutney to top my mini muffin turkey meatloaf.

A few things purchased at the farmer's market can increase your vegetable (or fruit) intake- plus you've supported local farmers.

http://www.california-grown.com/

Thursday, July 22, 2010

Converting One Person at a Time...

Series: Produce Box, July 20, 2010 Deliver; Published Blog 10

Summer brings warm temperatures and bright sunny skies to help produce grow. This is one of my favorite produce procurement times of the year. There are bright wonderful colors and lots of varieties. Who could deny that fresh tomatoes, eggplant, zucchini, peppers, corn or melons taste added on to the menu- certainly not me!
I eat a colorful rainbow variety when it comes to summer produce.
My latest produce box delivery was the valley box. I received the following items:
- White corn
- Slicing Tomatoes
- Zucchini
- Melon, musk Ambrosia
- Peaches Yellow
- Carrot Nantes
- Eggplant Japanese
- Cucumber Regular
- Tomato, cherry mixed medley


I had to patiently wait for my produce box to arrive at the house... I couldn't wait to eat the eggplant. My husband should be jealous of my love affair with this lovely purple vegetable called eggplant. It is a vegetable that is widely used in various cultures around the world. It takes on taste from seasonings very well with a smooth mushy texture. I like it grill, toasted, saute, stewed, broiled, and fried. This is one vegetable on my definitely like category.

Another item in my produce box that I've enjoyed quite surprisingly are the cherry tomatoes. As most of my family and friends know, tomatoes are a miss or hit for me. I cant eat tomatoes on their own but I can cook them or eat them raw with other vegetables for a pleasant experience. This is a prime example of foods prepared one way might not hit your fancy but another way sends you back for seconds.
My favorite recipe using cherry tomatoes is to cook it with caramelize onions. This sweet tasting cherry tomato relish is a great topping for meats, pasta, or even couscous.


Kitchen Mission:
I hope to inpire fellow readers to venture into the kitchen. Take a stab at a new recipe with some fresh produce in hand.


Until next time -- Have fun cooking!

Friday, July 16, 2010

Coffee and Steak

New tastes and new recipes are in demand. Willing participants are needed to try new ideas created by chefs. Here's my experiment involving coffee and beef steak.


Background:

I was introduced to a new author Cleo Coyle that writes Coffee House mystery novels. They are great imaginative escapes that involve coffee, plus recipes! This appealed to my inner desire to create and cook which is a lot of fun for me. The inspiration for my coffee marinated steaks was from my leisure reading of the mystery novel.


Caffeinated Barbecue Steaks


I placed my steaks from the refrigerator onto the counter. I grabbed a shallow dish to create my coffee marinade. I made this really easy for myself by grabbing a Starbucks VIA packet and a little cold water. Empty packet, add water, stir, and place steaks into dish. Yes, coffee made with VIA is that simple to make. Absolutely love using the product.


I thought about adding seasonings but I was hesitant. I wanted to keep a true coffee taste so I added no other spices or flavors. I let it sit for 24 hours in the coffee marinade.


The following evening I started up my barbecue to grill the steaks.


Once it was ready, I placed the steaks on the grill and quickly seasoned with a little season salt.


Cook the steaks to your preference. I cannot recommend the amount of time it might take. If you are worried about under or over cooking, invest in a meat thermometer


Remove and let it sit for at least 5 minutes. This is important to keep the meat juicy.


Serve with your favorite vegetable and a carbohydrate.


My vegetable to accompany this recipe was the following:

Sweet and Spicy Carrots

Grab a small sauce pan.
Heat-up on medium heat.
Add in a tablespoon of butter.
Let it warm up.
Add in about 2 tablespoons of brown sugar.
Add a dash of coffee liqueur, cinnamon, and nutmeg.
A quick dash of salt and pepper.

Let the sugar mixture bubble to cook down a little.
I added in caramelized onions that I had precooked prior to making the sauce.
I let it simmer for a little bit more.
Finally add in fresh cut carrots cut into rounds. I used a bunch Nantes carrots from produce box.
Let the carrots cook in the mixture for a quick 1-2 minutes and turn it off.
I like my carrots to have a crunch.

My carbohydrate to accompany the meat and vegetable:

Toasted Barbecue Garlic Bread

Pre-make the garlic oil spread. This is really easy to make with fresh or bottled garlic.
Grab your small sauce pan.
Heat-it up on a medium low.
Add in about 1/4 cup of olive oil.
Next add in the chopped garlic.
Optional: Add in some fresh basil, a little cayenne powder, and a little seasoning to preference.
Let the garlic oil mixture cook until garlic is tender.

Toasting bread on the barbecue should be the last item cooked on the grill. Reason- the coal fire has cooled downed so the bread gets a chance to brown up without burning.
Place your bread slices on the grill. Let the bread toast up which will happen fairly quick. After it is flipped over, spoon the garlic mixture over the bread.

All the above recipes put together makes a fairly tasty meal.
When plating up, spoon the sweet and spicy carrots sauce over the meat. It will be totally worth it in taste!

Enjoy and have fun cooking!

Friday, July 2, 2010

Long Time No New Postings????

Thank you it is nice to be back! I took a sabbatical leave from my blog publishing to create new recipes in my own kitchen. Yes- we finally got our house after a 16 month wait. I'm soooo excited to be in my kitchen. I've been busy cleaning, unpacking, and setting up my big kitchen.

I'm still receiving my produce boxes at my new house. It has been quite delightful with the introduction of summer produce. My latest boxes have brought blueberries, melons, tomatoes, green beans, and so much more!


As promised new recipes:

Spicy Rotini, Zucchini, and Italian Sausage

Caramelize about ¼ an onion, diced
Add in about 5 hot cayenne peppers, whole
Once the onion is almost browned and translucent, add about 1 tablespoon of chopped garlic
Remove the peppers.


Preparing the Sausage:
I used 3 pork sausage links about ½ foot long.
I placed my sausage in a pot of water and brought it to a boil for about 15 minutes.
I set aside to cool and drained the water
Once the meat is ready to handle, I removed the casing and tore the sausage into pieces.
Set aside.

Boil the pasta to al dente
I used a ½ box of rotini

Allow the meat to brown and become crispy
I diagonally sliced two zucchinis to place around the edges while the meat was cooking
Carefully toss the meat in the middle to cook on the other side without disturbing the zucchini

Drain the pasta and rinse with cold water.
Add on top of the meat.

Next add in about 2 tablespoons of tomato paste.
Toss the pasta, meat, and zucchini to coat with the tomato sauce
Season with pepper and salt

Allow the dish to cook a little longer about 5 minutes and stir with an additional 5 minutes.
Serve with garlic bread and a green salad.


Greek Couscous Salad

I prepared the couscous to box directions. 1 cup of dry couscous and 1 cup of water
Let it cool.


Need:
1 cucumber
¼ cup of sun dried tomatoes
¼ cup of feta cheese
¼ cup kalamata olives

Toss together and fresh with a little lemon juice, pepper, and salt.
Optional Idea: Use Orzo for the carbohydrate.


Deliciously Quick Fajitas


Prepare your meat first.
I learned through trial and error that if you brown the sides of the meat it will hold in the moisture and keep it tender. This technique can be used to for many recipes like stir-fries, stews, or pasta dishes.

Cut your meat into small strips.
Heat-up a frying pan with enough oil to cover the bottom. I used canola oil. (In the past I have used sesame oil too.)
Then in small batches just toss in handfuls of meat. Cook just enough to brown the edges. The insides will still be pink. (This is OK because the meat will be tossed back into the pan later on.)
Remove the meat and place on a paper towel. I like to salt it at this time.

Use the same pan for the remaining cooking preparation.
Keep the pan on medium heat.
I slice up half of a white onion into slivers and toss it in with the remaining oil.
Let the onions cook until tender. (Optional: toss in whole cayenne peppers for heat.)
For a little moisture, I diced up a tomato and tossed it in.
For those who love bell peppers, add in slivers of the colorful bell peppers.

Let the mixture simmer for about 5 minutes.

Add in the beef and squeeze fresh lime juice over the top. Then toss in the limes to the pan. (Optional: Bottled lemon juice will also do the trick.)
Reduce the heat and let the mixture simmer together.

Prepare the tortillas of choice: corn or flour.

Final dish: Grab a tortilla, add in the meat/vegetable mixture, add in shredded cabbage, and a dollop of sour cream. Then get ready for the mouth watering bite of your own homemade fajita.

Options: Various fish or meats can be used for the meal. Follow the simple reasoning of not overcooking the fish or meat the first time because it is cooks a second time.

Checca Sauce

Cherry tomatoes are in season!!

This is a wonderful fresh tomato sauce. I have to share it because I love making it during the summer season. It tastes great hot or cold. Raw food at its best!

In a food processor add the following items:
- 1 package of cherry tomatoes
- 2-3 tablespoons of olive oil
- ½ onion
- 1-2 teaspoons of fresh garlic
- Handful of fresh basil
- ½ cup of fresh Parmesan
- Salt and Pepper to taste
Puree until well mixed and taste.

Cube up a ½ chunk of fresh mozzarella.
Cook up a fresh batch of pasta.
Toss all the checca sauce, fresh mozzarella, and pasta in a bowl.
Serve up and Enjoy!


Homemade Corn Chips

One thing I love to eat at Mexican restaurants is the corn chips. I like to eat these plain chips with salsa, or avocado. Learning how to make these chips is easy on the budget. Just remember it does require a little extra time to prepare. It took me about a half hour to prepare about a bag of chips.

Set-up

Heat-up the oven on a low temperature. Grab a cookie sheet and line it with aluminum foil.

Grab a plate and place about 3-4 layers of paper towels to drain the oil of the chips.

Grab a sauce pot and heat-up on medium-high heat. Pour in the oil about a fourth of the way from the bottom.

I like to cut the corn tortilla into triangle eighths.

Test the oil by throwing in one triangle to see if it starts to bubble on the edges. If it ready throw in about 10-14 tortilla triangles...this depends on the size of your pot. Don't overcrowd the oil it will reduce the temperature and take longer to cook.
As the chips starts to cook to a light brown, flip the tortilla chips.
Once the other side is cooked and the corn tortilla has firmed up, then transfer to the cookie sheet.
To finish the cooking process with crisping of the chip, place in the preheated oven.


Deserts:

What can you do with fresh nectarines or peaches if you can't eat them quick enough? My solution is to make turnovers. I like to use a pie crust made simple: Krusteaz Pie Crust. Thanks to my Dad he introduced me to it. A great pie crust in seconds.

Tip: I found this product does not require much water just enough to pull it together.

Nectarine or Peach Turnovers

Preheat oven to 350 degrees.

Prepare the crust:
Use enough pie dough mixture for one pie with a crust.

Prepare the pie filling:
I grabbed my freshly delivered nectarines (or peaches) that had been ripening in a brown paper bag on the counter. I left the skin on as I sliced into slivers into my mixing bowl. I sprinkle a little lemon juice, brown sugar, and cinnamon. One additional item is a little corn starch to gel up the liquid. The recipe use intuitive measurements.

Flour a board with a little flour. Partition into about 7-8 small golf size dough balls.

Roll out the dough into a triangle/oval shape. Place on a cookie sheet covered with parchment paper.
Add a little of the fruit mixture to the middle of each the rolled out dough.
Close the flap and place in the oven for about 20-25 minutes. Check it to see if the dough is cooked and the bottoms are slightly browned.
Let it cool.


In picture above I used for this batch fresh blueberries.

Optional: If you have fresh strawberries or blueberries, try with a little fresh whipping cream for summer shortcake.